Subscribe
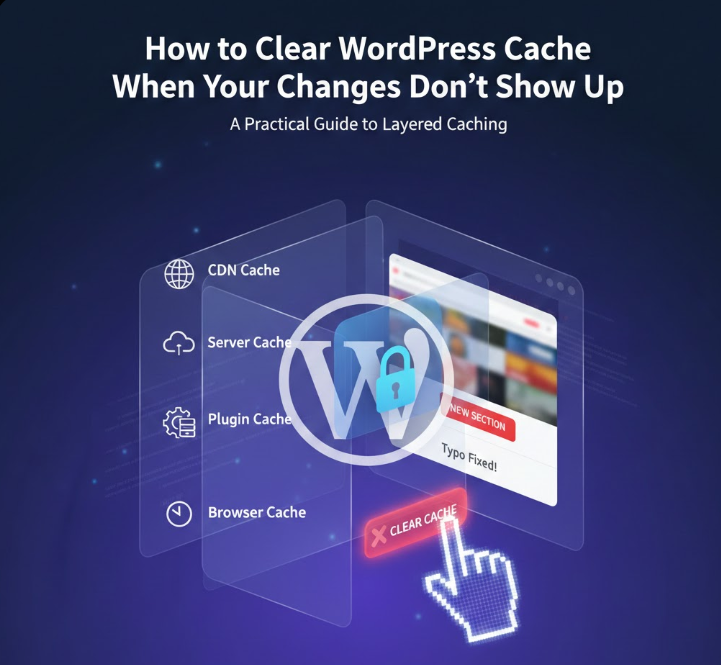
You make a small update on your WordPress site. Maybe you fix a typo, adjust a button color, or publish a new section. You refresh the page, then refresh it again, and nothing changes. The old version is still there, as if WordPress is simply ignoring you. This is one of the most common situations website owners run into, and in most cases, the issue has nothing to do with broken code or a failed update. The real culprit is usually cache.
WordPress caching exists to make websites faster and more stable. It stores static versions of your pages so visitors do not have to wait while WordPress rebuilds everything from scratch on each visit. The problem is that cached data can live in several different places at the same time. A plugin may cache your pages, your hosting provider might add its own server-level cache, your browser keeps local files, and a CDN can serve cached content from a completely different location. When something goes wrong, clearing cache in only one place often is not enough.
This is why many guides on how to clear WordPress cache feel confusing or incomplete. They tell you to click one button inside a plugin and assume the problem is solved. In reality, WordPress caching is layered, and understanding where the cache is stored matters just as much as knowing how to remove it. Clearing the wrong cache, or clearing it too often, can even cause performance issues instead of fixing them.
In this tutorial, we take a practical approach. You will learn how to clear cache in WordPress step by step, using the methods that actually apply to real-world setups. We will cover cache plugins, hosting dashboards, browser cache, and CDN services, explaining when each one is relevant and when it is not. The goal is not just to show you how to clear cache, but to help you understand why your changes are not showing up and how to fix that without breaking your site or wasting time.
If you have ever updated your site and wondered why nothing happened, this guide is for you.
What Is Cache? Plus, How Cached Information Is Stored
Cache is a system that saves a static version of your WordPress website so it does not have to be rebuilt from scratch every time someone visits a page. Instead of running heavy PHP scripts and querying the database on each request, WordPress can serve a ready-made version of the page almost instantly. This is one of the main reasons caching improves website speed, creates a smoother user experience, and indirectly supports SEO.
For website owners, caching can happen in more than one place, and that is where things often get confusing. One common method is client-side caching, also known as browser caching. In this case, parts of your website, including HTML files, stylesheets, and images, are stored directly on the visitor’s device. When that same user returns to your site, the browser loads the cached version locally instead of downloading everything again.
Another approach is server-side caching. Here, static HTML versions of your pages are stored on the web server itself, either on the hard disk or in RAM. This method is widely used by hosting providers and is especially important for larger or more complex WordPress websites that rely on multiple databases or handle higher traffic volumes.
Between the two, browser caching is usually the fastest from the visitor’s perspective, since files are loaded straight from the local device. However, server-side caching still offers a significant performance boost compared to not using any caching at all. In practice, most modern WordPress setups use a combination of both to achieve the best results.
Why We Use Website Caching & Why You May Need to Clear Cache
Website caching exists for one simple reason: it helps deliver a faster and smoother experience to visitors. When a cached, static version of your site is served instead of generating each page dynamically, loading times drop noticeably. Pages open quicker, interactions feel more responsive, and visitors are far less likely to leave out of frustration.
Speed alone, however, is not the whole story. A fast website only makes sense if it actually shows something new or useful. Visitors come back because content changes, pages improve, and features evolve. If nothing ever updates, performance loses its value.
This is where caching can become confusing. While caching systems are designed to refresh when changes happen, that does not always work perfectly in real life. WordPress websites often rely on multiple caching layers, and sometimes those layers do not communicate as cleanly as they should. As a result, updates may be made successfully, but the cached version continues to appear instead.
When this happens, changes do not show up right away. You might publish new content, adjust a layout, update a plugin, or switch a theme setting, only to see the old version still loading. The site itself is updated, but visitors are being served cached data instead of the latest version.
In situations like these, manually clearing cache becomes necessary. It ensures that outdated files are removed and that WordPress delivers the most recent version of your site to users. Whether the change involves design tweaks, content updates, plugin behavior, or database modifications, clearing cache helps prevent confusion and guarantees that visitors see exactly what you intended to publish.
What Does Purge From Cache Mean?
Terms like purge, delete, and clear cache are often used interchangeably, and in practice they all describe the same action. You are removing stored data that your browser or server has saved from your WordPress site. This includes cached pages, images, and other files that were kept to speed up loading times. Once that data is removed, the next visit to your website forces the browser to request fresh content directly from the server.
One thing many people do not expect is that clearing cache can also affect saved sessions. In some cases, you may be logged out of your WordPress dashboard or other connected services. That is normal behavior, not an error. Before purging cache, it is a good idea to make sure you remember your login details or have them stored somewhere secure.
After a full cache purge, it is also common to notice a temporary change in performance. Pages may load a bit slower at first, not faster. This happens because the caching system has to rebuild and store the updated version of your site again. Once that process is complete and the cache is repopulated, page speed should stabilize and return to its optimized state, assuming everything is set up correctly.
Read also: How to Improve Time to First Byte (TTFB) for Your WordPress Site
How to Clear Cache in WordPress Using a Plugin
“How do I clear the cache in WordPress?” For most site owners, caching plugins are the simplest way to manage cached data. They work directly inside the WordPress dashboard and allow you to clear stored files without contacting your hosting provider or touching server settings. If you are logged in as an administrator, this is usually the fastest and safest method.
Below are practical instructions for clearing cache using one of the most widely used caching plugins.
Clear WordPress Cache With WP Super Cache Plugin
WP Super Cache is a relatively lightweight plugin, which means it offers fewer advanced controls but is easy to use and reliable for everyday caching needs. This also makes clearing cache straightforward, even if you are not deeply familiar with WordPress performance settings.
To clear cache, open your WordPress dashboard and navigate to Settings > WP Super Cache. Inside the plugin settings, you will find several ways to remove cached files. The most common option is available directly on the main settings screen. Once you click the Delete Cache button, the plugin removes all saved HTML pages, forcing WordPress to generate fresh versions on the next visit.
How to clear cache in WP Super Cache:
- Open the WordPress dashboard and go to Settings > WP Super Cache.
- Scroll down the main settings screen until you reach the cache management section.
- Click the Delete Cache button to remove all stored HTML cache files.
- Alternatively, use the Delete Cache option in the WordPress admin toolbar at the top of the screen to clear cache instantly without opening the settings page.
Clear WordPress Cache With W3 Total Cache Plugin
W3 Total Cache by BoldGrid is one of the more advanced caching plugins available for WordPress. It is commonly used on websites that require fine-grained control over performance settings, including page cache, object cache, database cache, and CDN integration. When configured correctly, it can noticeably improve loading times, especially on larger or high-traffic sites.
To clear cache using W3 Total Cache, open your WordPress dashboard and navigate to the Performance menu. This section contains all caching-related settings for the plugin and gives you multiple ways to remove stored cached data, depending on whether you are only clearing cache or also updating configuration options.
Scroll down to the relevant cache section, such as Page Cache. When caching is enabled, W3 Total Cache provides two different actions, each serving a specific purpose.
Cache clearing options in W3 Total Cache:
- Go to Performance > Page Cache in the WordPress dashboard.
- Locate the buttons near the bottom of the settings panel.
- Click Empty Cache if you want to remove cached files while keeping all current settings unchanged.
- Click Save Settings & Purge Caches if you have modified cache settings and want to apply changes while clearing all existing cached data at the same time.
If you need to purge cache instantly without opening the settings pages, W3 Total Cache also allows you to clear all cached content directly from the admin toolbar.
Quick cache purge via admin toolbar:
- Look at the WordPress admin bar at the top of the screen.
- Hover over the Performance menu item.
- Select Purge All Caches from the dropdown list.
This approach ensures that all cached content generated by W3 Total Cache is removed immediately, allowing WordPress to serve updated pages and assets without delay.
Clear WordPress Cache With WP Fastest Cache
WP Fastest Cache is another plugin that is easy to configure and use when you want to clear cache on a WordPress site. In fact, it’s a fan favorite for many WordPress users because of its simplicity and user-friendliness.
WP Fastest Cache Options
When using WP Fastest Cache, clearing cache can be done directly from the plugin settings.
How to clear cache using WP Fastest Cache settings:
- Open the WordPress dashboard and go to WP Fastest Cache in the left-hand menu.
- Click on the Delete Cache tab at the top of the settings page.
- Choose one of the available options:
- Delete Cache to remove cached pages only.
- Delete Cache and Minified CSS/JS to clear cached pages along with minified CSS and JavaScript files.
- Select the option that matches your needs, and the plugin will immediately remove the selected cached data.
You can also clear cache without opening the plugin settings page.
How to clear cache from the admin toolbar:
- Look at the WordPress admin toolbar at the top of the screen.
- Click the Clear Cache menu item.
- Choose whether you want to clear cached pages only or remove cached pages together with minified CSS and JavaScript files.
This method is especially useful when you want to purge cache right after publishing changes or updating site assets, without navigating through plugin menus.
Clear WordPress Cache With WP Rocket
WP Rocket is one of the most popular premium caching plugins for WordPress, known for its simple interface and effective performance optimization. Clearing cache with WP Rocket can be done in several convenient ways, depending on whether you want to purge the entire site or only a specific page or post.
How to clear cache using WP Rocket settings:
- Open the WordPress dashboard and go to Settings > WP Rocket.
- Make sure you are on the Dashboard tab.
- Click the Clear Cache button to remove all cached files generated by the plugin.
You can also clear cache without opening the settings page.
How to clear cache from the WordPress admin toolbar:
- Look at the admin toolbar at the top of the screen.
- Hover over the WP Rocket menu item.
- Click Clear Cache to instantly purge all cached content.
If you only need to remove cached data for a specific page or post, WP Rocket allows you to do that as well.
How to clear cache for a single page or post:
- In the WordPress dashboard, open Pages or Posts from the left-hand menu.
- Hover over the page or post you want to update.
- Click the Clear This Cache link to remove cached data for that specific item only.
You can also clear cache directly from the editor.
How to clear cache from the page or post editor:
- Open the page or post in the WordPress editor.
- Look at the Publish panel on the right-hand side.
- Click the Clear Cache button located just above the Move to Trash option.
These options make WP Rocket especially convenient when you want precise control over which parts of your site are refreshed without clearing the entire cache.
Clear WordPress Cache With Hummingbird
Hummingbird by WPMU DEV is a feature-rich performance plugin that goes beyond basic caching. It helps compress files, enable lazy loading, monitor website performance, and manage cache from one central place. With active installations across more than a million websites, it is widely used on WordPress sites that need both performance insights and practical optimization tools.
Despite the number of features it offers, clearing cache with Hummingbird is refreshingly straightforward. You do not need to dig through multiple settings pages or advanced configuration panels. Everything is accessible directly from the plugin menu inside the WordPress dashboard.
How to clear cache using Hummingbird:
- Open the WordPress dashboard.
- Navigate to Hummingbird Pro in the left-hand menu.
- Click on Caching to open the caching settings.
- Select the Clear Cache option to remove all stored cached files.
Once the cache is cleared, WordPress will regenerate fresh versions of your pages on the next visit. This is especially useful after publishing updates, adjusting layouts, or making changes that are not immediately visible on the front end.
Read also: The Ultimate Guide to Google Core Web Vitals for WordPress
How to Clear Cached Files Through Your Web Hosting Provider
Many managed WordPress hosting providers handle caching directly at the server level. This means you do not need a separate plugin to benefit from full-page caching, object caching, or other performance optimizations. In most cases, hosting-level cache works automatically in the background and requires very little manual intervention.
That said, there are moments when clearing server cache manually becomes necessary. This usually happens after making design changes, updating site content, or troubleshooting issues where updates are not immediately visible on the front end.
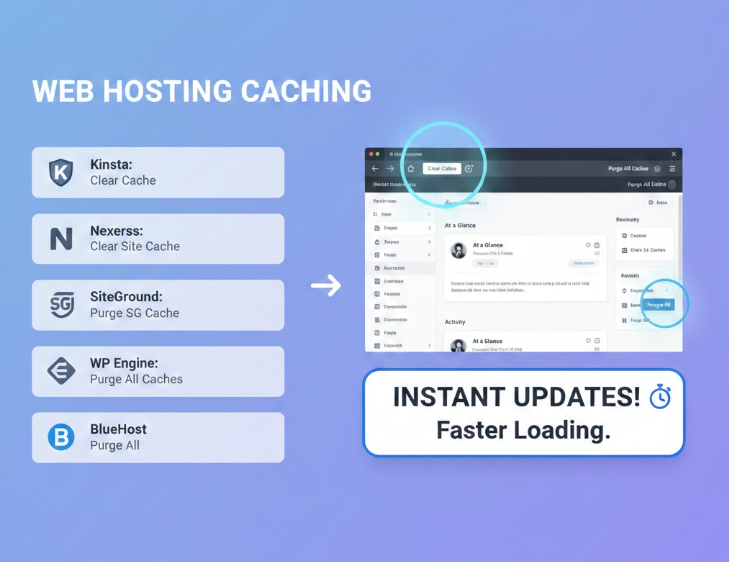
1. Clear All Cache With Kinsta
Kinsta is a premium managed WordPress hosting provider that includes built-in server-side caching as part of its platform. Their caching system covers both full-page cache and object cache, helping WordPress sites load faster without additional configuration.
If you need to manually clear cache while using Kinsta, the process is straightforward and does not require accessing the hosting control panel separately.
How to clear cache on Kinsta:
- Log in to your WordPress dashboard.
- Look at the admin toolbar at the top of the screen.
- Locate the Clear Cache option on the right-hand side.
- Click Clear Cache to immediately purge all server-level cached files.
Once cleared, Kinsta will automatically rebuild cache as visitors access your site again. This ensures that the most recent version of your pages is served without delay, while performance remains optimized in the background.
2. Clear All Cache With Nexcess
Nexcess is a managed hosting provider that offers hosting solutions for WordPress, WooCommerce, and Magento. For WordPress users, one of the key advantages is built-in page caching handled automatically at the server level. This means caching is enabled by default and does not require additional plugins to work effectively.
In most cases, Nexcess manages cache in the background without any manual input. However, if you make changes that are not immediately visible, such as layout updates or content edits, clearing the site cache manually can help ensure the latest version of your site is served to visitors.
How to clear cache on Nexcess:
- Log in to your WordPress dashboard.
- In the left-hand menu, click Nexcess and then select Page Cache.
- Look at the WordPress admin toolbar at the top of the screen.
- Click the Clear Site Cache option to purge all cached pages.
After clearing the cache, Nexcess will automatically regenerate cached pages as users visit your site. This allows you to see updates immediately while keeping server-level performance optimization in place.
3. Clear WordPress Cache With SG Optimizer
SG Optimizer is the official performance and caching plugin developed by SiteGround. It is designed to work directly with SiteGround’s hosting infrastructure and handles several optimization tasks, including page caching, dynamic caching, file compression, and frontend performance tweaks.
Because SG Optimizer is tightly integrated with SiteGround servers, caching is usually enabled by default and managed automatically. Still, there are situations where you may want to manually clear cache, especially after updating content, changing layouts, or adjusting plugin or theme settings.
How to clear cache using SG Optimizer:
- Log in to your WordPress dashboard.
- In the left-hand menu, click SG Optimizer.
- Open the Caching section of the plugin.
- Click the Flush Cache button to remove all stored cached data.
SG Optimizer also provides a faster way to clear cache without opening the plugin settings.
How to clear cache from the WordPress admin toolbar:
- Look at the admin toolbar at the top of the screen.
- Click the Purge SG Cache option.
- Wait a moment while the cache is cleared across the site.
Once the cache is purged, SiteGround automatically rebuilds cached pages as visitors access your site, ensuring that the most recent version of your content is displayed without sacrificing performance.
4. Clear All Cache With WP Engine
WP Engine is a managed WordPress hosting provider that includes its own built-in caching system at the server level. Because caching is handled automatically by the platform, there is no need to install or configure a separate caching plugin to benefit from improved performance.
Most of the time, WP Engine manages cache in the background without any action required. However, when updates are not immediately visible or after making changes to your site, manually clearing cache can help ensure that the latest version of your content is served correctly.
How to clear cache on WP Engine:
- Log in to your WordPress dashboard.
- Look at the WordPress admin toolbar at the top of the screen.
- Click the WP Engine menu item.
- Under General Settings, select the Purge All Caches option to clear all cached data.
Once the cache is purged, WP Engine automatically rebuilds cached pages as visitors access your site again. This keeps performance optimized while ensuring your most recent changes are visible right away.
5. Clear All Cache With BlueHost
BlueHost is one of the most widely used WordPress hosting providers and includes a built-in caching solution as part of its hosting environment. This server-level cache helps improve website performance and reduces page load times without requiring additional caching plugins.
In most cases, BlueHost manages caching automatically. However, when recent updates are not visible or after making changes to your site, manually clearing cache can ensure that visitors see the most up-to-date version of your content.
How to clear cache on BlueHost:
- Log in to your WordPress dashboard.
- Look at the WordPress admin toolbar at the top of the screen.
- Find the Caching menu item.
- Hover over it and select the Purge All option to clear all cached pages and data.
After the cache is purged, BlueHost automatically regenerates cached files as visitors access your site, keeping performance optimized while displaying the latest updates.
Read also: Boost Your WordPress Site Speed: A Simple Guide
More Tools to Delete Cache Files
In some setups, clearing cache through a plugin or hosting provider is not enough. This usually happens when your WordPress site uses additional caching layers, such as a CDN or a reverse proxy. These systems operate outside of WordPress itself, so they require separate cache management.
1. How to Clear Cache When You Have a CDN
A content delivery network, or CDN, adds an extra caching layer by serving cached copies of your website from data centers located closer to visitors. This not only improves loading speed but also reduces the physical distance between users and your content.
Because CDN caching is handled externally, it cannot be cleared from the WordPress dashboard.
How to clear CDN cache:
- Log in to your CDN provider’s dashboard.
- Open the cache or performance management section.
- Locate the option to purge or clear cached content.
- Confirm the action to remove cached files across all CDN locations.
Each CDN provider uses its own interface and terminology, so checking their documentation or support resources is the safest way to ensure cache is cleared correctly.
2. How to Clear Cache on Your Reverse Proxy
A reverse proxy, such as Varnish or Nginx, sits between your server and visitors and can cache pages before WordPress processes them. This type of caching is common on managed hosting platforms and high-performance WordPress setups.
If your site uses a reverse proxy, the Proxy Cache Purge plugin provides a practical way to manage this cache directly from WordPress.
Why use a reverse proxy cache purge plugin:
- To control whether visitors see cached or live content while you work on updates.
- To verify that caching is functioning correctly.
- To identify conflicts caused by themes or plugins that prevent cache from clearing properly.
How to enable Development Mode:
- Open the WordPress dashboard.
- Go to Proxy Cache > Settings.
- Enable Development Mode to temporarily prevent visitors from seeing live changes.
This ensures users continue seeing cached content while updates are being made behind the scenes.
How to check if caching is working properly:
- Navigate to Proxy Cache > Check Caching.
- Enter your website URL.
- Run the cache check and review the results.
If a conflict exists, the tool will indicate whether a plugin or theme is interfering with proper cache behavior.
How to purge reverse proxy cache completely:
- Look at the WordPress admin toolbar at the top of the screen.
- Open the Cache menu.
- Select Purge Cache (All Pages) to clear all reverse proxy cached content.
This removes cached files stored at the proxy level and ensures visitors receive the most up-to-date version of your site.
3. How to Clear Cache on Your WordPress Firewall
A WordPress firewall acts as a protective layer between your website and incoming traffic. Technically, it works as a type of reverse proxy, since it inspects and filters requests before they ever reach your server. The key difference is purpose: a reverse proxy is mainly focused on performance, while a firewall is designed primarily for security.
Because of this, cache management options vary from one firewall solution to another. Not every firewall tool allows you to manually clear cache. However, some popular services, such as Sucuri Security and Cloudflare, include built-in cache controls that let you purge stored content when needed.
Clearing Cache with Cloudflare
Cloudflare gives you two main options when it comes to cache management. You can either clear all cached data across the entire site or purge cache for a specific URL. This level of control is useful when you want to refresh a single page without affecting the rest of your website.
How to purge all cache in Cloudflare:
- Log in to your Cloudflare dashboard.
- Open your website and click the Caching section in the top menu.
- Select the Purge Everything option.
- Confirm the warning message to proceed with clearing all cached data.
This removes all cached files stored by Cloudflare and forces fresh content to be served across the entire site.
How to purge cache for a specific URL in Cloudflare:
- Log in to your Cloudflare dashboard and open the Caching section.
- Click the Custom Purge option.
- In the Purge by field, select URL.
- Enter the full URL of the page you want to clear.
- Complete any required fields and click Purge to remove cached data for that page only.
This approach is ideal when only one page has changed and you do not want to invalidate the entire cache.
Ideally, your firewall should be configured to clear cache automatically whenever content is updated. This reduces the need for manual intervention and prevents situations where visitors see outdated content. Still, manual cache clearing remains a useful fallback when updates do not appear as expected or when troubleshooting display issues.
4. How to Clear Cache Using the WordPress Command Line
If you are wondering how to clear WordPress cache without using plugins, the WordPress command line can be an option. This method is intended for users who are comfortable working with WP-CLI and understand what type of cache they are clearing.
It is important to note that using the WordPress command line does not clear page cache. Instead, it flushes the object cache, which stores cached database queries. Because of this, this approach only makes sense if you specifically need to reset object-level caching and know that page caching is handled elsewhere, such as by your hosting provider or a separate caching system.
To clear the object cache via the command line, you need access to WP-CLI on your server. Once connected, run the following command from your WordPress installation directory:
# Flush cache.
$ wp cache flush
If the command runs successfully, you will see a confirmation message indicating that the cache has been cleared:
Success: The cache was flushed.
After flushing the object cache, WordPress will begin rebuilding cached database queries as pages are loaded again. This can help resolve issues related to stale data, unexpected query results, or performance inconsistencies caused by outdated object cache entries.
Because this method targets only object cache, it should be used deliberately and not as a general replacement for clearing page cache through plugins, hosting tools, or CDNs.
5. How to Clear Browser Cache
When troubleshooting WordPress cache issues, it is easy to focus only on server-side or plugin-based caching. However, web browsers also store cached versions of websites. This means that even if WordPress cache has been cleared correctly, your browser may still be loading an older version of the page.
If changes are not showing up after clearing cache in WordPress, clearing your browser cache is often the missing step. This forces the browser to download fresh files instead of relying on locally stored data.
Below are step-by-step instructions for clearing browser cache in the most commonly used browsers.
Safari Tutorial
Safari stores cached website data separately from cookies, which gives you precise control over what gets removed.
How to clear browser cache in Safari:
- Open Safari and click Safari in the top-left menu.
- Select Preferences from the dropdown.
- Go to the Privacy tab.
- Click Manage Website Data next to “Cookies and website data.”
- Select Remove All to clear cached site data.
This removes stored website files and forces Safari to reload fresh content the next time you visit a page.
Google Chrome Tutorial
Chrome allows you to clear cache either quickly or with more granular control over what data is removed.
How to clear browser cache in Google Chrome (quick method):
- Click the three vertical dots in the top-right corner of the browser.
- Select More Tools, then click Clear Browsing Data.
- Choose the time range you want to clear.
- Make sure Cached images and files is selected.
- Click Clear data.
How to clear browser cache in Google Chrome (advanced method):
- Open the Chrome menu and select Settings.
- Go to Privacy and Security.
- Click Clear Browsing Data.
- Open the Advanced tab.
- Select the specific data types you want to remove, such as cached images and files.
- Click Clear data to confirm.
This method is useful if you want to keep cookies or saved passwords while clearing cache only.
Firefox Tutorial
Firefox makes it easy to clear cached content while choosing whether cookies should be removed at the same time.
How to clear browser cache in Firefox:
- Click Firefox in the top menu bar.
- Select Preferences.
- Open the Privacy & Security section from the left-hand menu.
- Scroll to Cookies and Site Data.
- Click Clear Data.
- Choose whether to clear Cached Web Content, Cookies and Site Data, or both.
- Confirm your selection to clear the cache.
Clearing cached web content ensures Firefox loads the most recent version of your website, which is especially helpful when testing design or content changes.
Final Thoughts on Clearing WordPress Cache
Caching is one of those things that quietly improves performance when everything works as expected, and instantly becomes frustrating when it doesn’t. As you’ve seen throughout this guide, WordPress caching is rarely a single system. It is usually a combination of plugins, hosting-level cache, CDNs, firewalls, reverse proxies, and even browser storage working together. When changes do not appear, the issue is often not that cache exists, but that it exists in more than one place.
The key takeaway is not to clear cache blindly, but to understand where caching is happening in your setup. Clearing a plugin cache while ignoring server-level or CDN cache rarely solves the problem. The same goes for testing changes without clearing browser cache, which can easily make it look like nothing has updated at all.
Once you understand how these layers interact, cache management becomes predictable instead of frustrating. You know when to purge everything, when to clear a single page, and when cache is not the issue at all. That clarity saves time, prevents unnecessary troubleshooting, and helps you keep your site fast without breaking things in the process.
For growing websites, proper cache handling is closely tied to broader technical decisions. Solid Web Development ensures caching is implemented correctly from the start. Ongoing Website Care helps prevent conflicts as plugins, themes, and hosting environments evolve. And thoughtful UI/UX Design makes sure performance optimizations never come at the cost of usability or visual consistency.
When caching is understood and managed correctly, it stops being a problem and starts doing what it was always meant to do: quietly make your WordPress site faster, more reliable, and easier to maintain.