Subscribe
If you run a WordPress website, you have probably installed some form of analytics. But traffic numbers alone rarely explain what is actually happening on your site.
To make informed decisions, you need to understand where visitors come from, how they interact with your pages, and which actions lead to enquiries, sign-ups, or sales.
Google Analytics 4 is designed to provide that level of insight. It goes beyond basic metrics and helps you see how users move through your website and where improvements can be made.
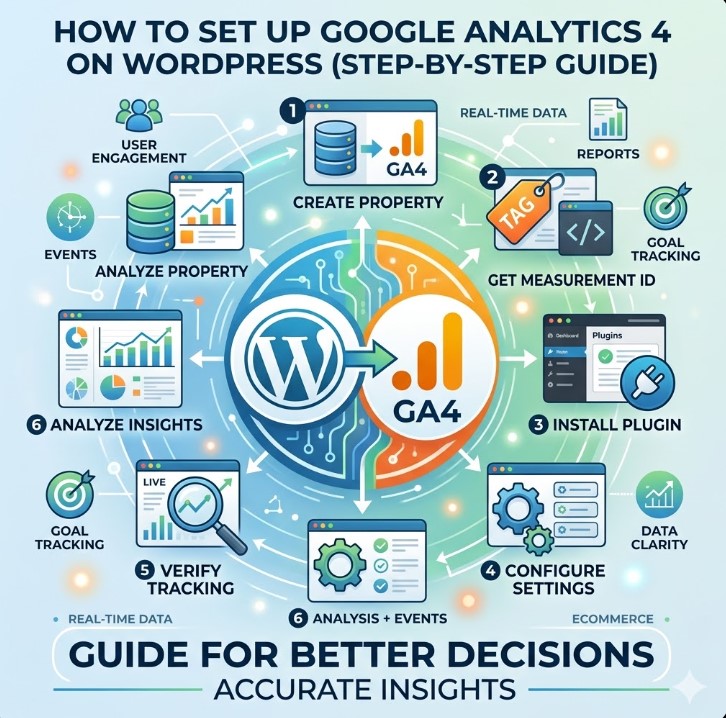
In this guide, you will learn how to set up Google Analytics 4 on WordPress step by step, using both simple and more flexible methods. You will also learn how to verify your setup, avoid common mistakes, and understand what to look at once tracking is in place.
By the end, you will have a working GA4 setup and a clear understanding of how to use it to analyse user behaviour.
Why Every WordPress Website Needs Google Analytics 4
If you run a website for business, content, or lead generation, one question matters more than anything else: what is actually working? Without analytics, it becomes extremely difficult to answer that with any real level of confidence.
Many WordPress site owners tend to focus primarily on traffic numbers — more visitors, more clicks, more impressions. However, traffic alone does not explain behaviour. It does not show why users leave, what keeps them engaged, or which pages actually contribute to meaningful results.
This is where Google Analytics 4 becomes essential. To better understand how it works behind the scenes, Google provides a detailed explanation of a Google Analytics 4 property in its documentation.
With GA4, you begin to see patterns that would otherwise remain invisible. Instead of looking at isolated metrics, you gain a clearer view of how users actually interact with your website, including:
- where your visitors come from (search, ads, social, referrals)
- which pages they spend time on
- how they move through your website
- what actions they take before leaving
More importantly, GA4 allows you to connect activity to outcomes.
For example, instead of simply seeing that a page receives traffic, you can understand whether it actually leads to:
- form submissions
- product views
- bookings or enquiries
This shift is critical because, from a business perspective, not all traffic has value. Some pages attract a high number of visitors but fail to convert, while others may bring in fewer users yet generate real leads or sales.
Without analytics, these differences remain hidden.
Another key aspect is decision-making. Whether you are working on SEO, running paid campaigns, or improving your website experience, every change should be based on data rather than assumptions. GA4 provides that foundation and allows you to make decisions with much greater clarity.
At the same time, it is important to understand one simple principle early on:
Installing analytics is only the first step. The real value comes from how well it is set up and what exactly you choose to track.
Even a basic setup already puts you in a much stronger position compared to running a website without real visibility into user behaviour. You move from guessing to understanding, and from assumptions to measurable insights.
And that is exactly why setting up Google Analytics 4 on WordPress is not just a technical task. It is a step toward making better, more informed decisions about your website and your business.
What Is Google Analytics 4 and Why It Matters
Google Analytics 4 (GA4) is a web analytics platform that tracks how users interact with your website.
Unlike previous versions, it does not rely on sessions as the main unit of measurement. Instead, everything is built around events. User interactions are recorded as events.
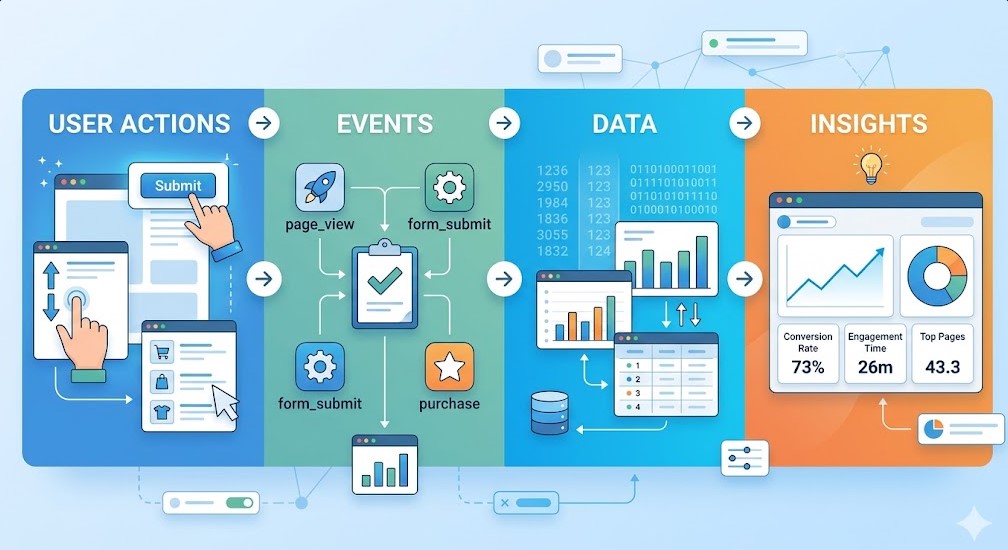
User Actions → Events → Data → Insights
Each step represents a layer of understanding:
- User actions — what people actually do on your site
- Events — how GA4 records those actions
- Data — structured information inside analytics
- Insights — what you can use to make decisions
This includes:
- page views
- clicks
- scroll depth
- form submissions
This approach gives a clearer picture of what actually happens on your site.
From a technical perspective, GA4 is more flexible. You are not limited to predefined tracking. You can define what matters and track it as needed.
From a business perspective, this is where it becomes more valuable.
GA4 allows you to understand:
- which channels bring valuable users
- how visitors behave across pages
- where users drop off
- which actions lead to results
Instead of just counting traffic, you start measuring behaviour.
Another key difference is that GA4 is designed for modern user journeys. Users do not move linearly anymore. They switch devices, return later, interact in different ways. GA4 handles this better than older models.
At the same time, it is important to keep one thing in mind.
GA4 does not automatically give you meaningful insights. It collects data. The value depends on how that data is structured and what exactly you track.
This is why a correct setup is important from the start.
Read more: How to Create Google Analytics Dashboards in WordPress
GA4 vs Universal Analytics (Quick Difference)
Before GA4, most websites used Universal Analytics (UA). The tracking logic there was different.
Universal Analytics was built around sessions. A session grouped user activity into a single visit. This worked, but it had limitations, especially with modern user behaviour.
GA4 uses a different model. Everything is based on events. Each interaction is tracked independently, which gives more flexibility and accuracy.
Here is the key difference in simple terms:
| Universal Analytics | Google Analytics 4 |
|---|---|
| Session-based | Event-based |
| Page views as main metric | Most interactions are tracked as events |
| Limited tracking flexibility | Fully customizable tracking |
| Less accurate for multi-device users | Improved cross-device tracking (depending on setup and data signals) |
| Focus on traffic | Focus on behaviour and actions |
This shift is not just technical. It changes how you analyse your website.
With Universal Analytics, you mostly looked at:
- sessions
- bounce rate
- page views
With GA4, the focus moves to:
- engagement
- interactions
- specific actions
From a business perspective, this is a major improvement.
Instead of asking “how many people visited?”, you start asking:
- what did users actually do
- where did they convert
- where did they drop off
One important takeaway:
GA4 is not just an update. It is a different way of thinking about data.
This is why simply installing it is not enough. To get real value, you need to understand how this new model works and what you want to measure.
What Data Google Analytics 4 Actually Tracks
Once GA4 is installed, it immediately starts collecting data. But it is important to understand what exactly is being tracked.
By default, GA4 captures several types of interactions without additional setup.
The most common ones include:
- page views
- scroll activity
- outbound clicks
- internal site search (if configured properly)
- basic engagement signals (such as time spent on page and user activity)
All of this helps you see how users interact with your content at a surface level.
For example, you can understand:
- which pages get attention
- how far users scroll
- whether they click external links
- how long they stay engaged
In GA4, all of this data is recorded as events. Even a simple page view is treated as an event.
At a basic level, the data structure looks like this:
Basic Tracking → User Behaviour → (Missing) Business Actions
This highlights an important limitation.
By default, GA4 shows you behaviour, but not necessarily outcomes.
For example, GA4 will track:
- page views
- clicks
- scrolling
But it will not automatically know:
- when a form is successfully submitted
- when a lead action is completed
- when a user completes a key business action
From a practical point of view, this means:
- you are not limited to predefined metrics
- you can expand tracking later
- you can focus on actions that matter to your website
This is where many websites stop too early.
They install GA4, see traffic data, and assume everything is set up correctly. In reality, they are only seeing part of the picture.
Understanding what GA4 tracks by default is useful. But the real value comes later, when you start tracking actions that directly relate to your goals.
What You Need Before Installing GA4
Before you start the setup, it is worth making sure that a few basics are in place. This will save time and help avoid common mistakes later.
At minimum, you need:
- a Google account
- access to your WordPress admin panel
- permission to edit settings or install plugins
That is enough to get started with a basic installation.
If you plan to use a more flexible setup, there is one additional element:
- a Google Tag Manager (GTM) account
This is optional, but it becomes important if you want more control over tracking later.
From a practical perspective, the difference is simple:
without Google Tag Manager, the setup is faster but offers less control, while using GTM requires slightly more effort but provides significantly more flexibility.
It is also important to make sure you have the right level of access.
For example:
- admin access in WordPress
- ability to install plugins or edit theme settings
- access to your Google account for creating GA4 property
Without this, even a simple setup can become frustrating.
One more small but important detail.
If your website already has some form of analytics installed, it is worth checking it before adding GA4. In some cases, tracking code may already exist, which can lead to duplicate data if not handled correctly.
A quick checklist before you begin:
| Requirement | Why It Matters |
|---|---|
| Google account | Needed to create GA4 property |
| WordPress access | Required to install tracking |
| Admin permissions | Allows full control over settings |
| GTM (optional) | Enables advanced tracking and control |
Once these basics are in place, the installation process becomes straightforward.
Read more: SEO Optimization: How to Rank Your Business on Google
Which Method Should You Choose? (Quick Recommendation)
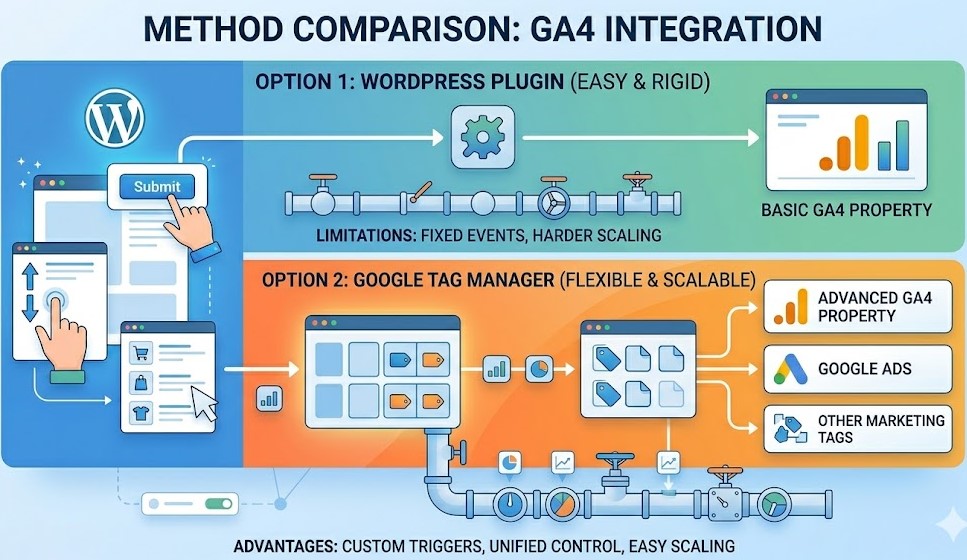
There are two main ways to install Google Analytics 4 on a WordPress website. Both work, but they serve slightly different needs.
The choice depends on how deep you plan to go with tracking.
Option 1: Plugin (simplest approach)
Using a plugin is the fastest way to get started.
You install it, connect your Google account, and GA4 begins collecting data. No code, no extra setup.
This approach works well if:
- you want a quick setup
- you only need basic traffic data
- you are not planning advanced tracking yet
It is a good starting point, especially for smaller websites or early-stage projects.
Option 2: Google Tag Manager (more flexible)
Google Tag Manager requires a bit more setup, but it gives you much more control.
Instead of relying on a plugin, you manage tracking through tags. This allows you to define exactly what you track and how.
This approach is better if:
- you plan to track form submissions or conversions
- you run paid campaigns
- you want cleaner and more scalable tracking
- you expect your setup to grow over time
Quick way to decide
If your goal is simply to get basic visibility into traffic, a plugin is often enough to get started.
If you want to better understand user behaviour and measure meaningful results, a setup based on Google Tag Manager is usually more suitable.
This does not mean you need to start with a complex setup. Many websites begin with a plugin and move to GTM later as their tracking needs grow.
However, if you already know that tracking conversions and user actions will be important, it often makes sense to set things up more robustly from the beginning.
Method 1: Install GA4 Using a Plugin (Beginner-Friendly)
This is the easiest way to install Google Analytics 4 on a WordPress website. It requires no coding and takes only a few minutes.
The idea is simple. The plugin connects your site with Google Analytics and handles the tracking code for you.
Step 1: Create a GA4 Property
Before installing anything on WordPress, you need to create a GA4 property.
Go to Google Analytics and open the Admin section. From there, you can either use an existing account or create a new one if needed. Then create a new property (select Google Analytics 4) and enter your website details to complete the setup.
Once the property is created, you will get a Measurement ID.
It looks like this:
- G-XXXXXXXXXX
This is the key element you will use in the next step.
Step 2: Install a WordPress Plugin
Now go to your WordPress dashboard:
- navigate to Plugins → Add New
- search for a GA4 plugin
Common options include:
- Site Kit by Google
- MonsterInsights
Both work, but they follow slightly different approaches.
The Site Kit by Google plugin is more direct and fully integrated with Google services, making it a straightforward option for most users. MonsterInsights, on the other hand, adds additional features and reporting inside WordPress.
Choose one and install it.
Step 3: Connect GA4 to Your Website
After installation:
- open the plugin settings
- sign in with your Google account (if required)
- or paste your Measurement ID manually
Once connected, the plugin will automatically add the GA4 tracking code to your website.
No manual editing is needed.
Step 4: Confirm Data Is Being Collected
After setup, GA4 should start receiving data.
You can check this by opening:
- Realtime report in Google Analytics
If you see active users, the setup is working.
Important Note
This method is fast and convenient. It works well for basic tracking.
However, it has limitations.
Plugins usually:
- restrict how events are configured
- add extra layers you cannot fully control
- are harder to scale for advanced tracking
For many websites, this is enough to get started.
But if your goal is to track specific actions like form submissions, conversions, or detailed user behaviour, you will likely need a more flexible setup.
Method 2: Install GA4 via Google Tag Manager (Recommended)
This method gives you more control over how data is collected. It takes a bit more setup, but it is more flexible and easier to scale.
Instead of relying on a plugin, you manage tracking through Google Tag Manager (GTM).
Step 1: Create a Google Tag Manager Account
Go to Google Tag Manager and create a new account.
You will need to:
- enter your account name
- set up a container for your website
- choose Web as the platform
Once created, GTM will provide you with a container code.
Step 2: Install GTM on Your WordPress Website
You need to add the GTM code to your website.
There are two common ways:
- using a plugin (simplest option)
- adding the code manually to your theme
If you prefer simplicity, install a plugin like:
- Insert Headers and Footers
- or any GTM-specific plugin
Paste the GTM container code into your website
Step 3: Add a GA4 Tag in GTM
Now go back to Google Tag Manager.
- Open your container
- Click Tags → New
- choose the Google tag or GA4 configuration tag, depending on the interface version
- Enter your Measurement ID (G-XXXXXXXXXX)
- Set the trigger to All Pages
This ensures the GA4 tag is triggered on every page.
Step 4: Publish Your Changes
After setting up the tag:
- click Submit in GTM
- publish your container
Your tracking is now live.
Why This Method Is Recommended
Using GTM gives you a cleaner setup and more control.
You can:
- add new tracking without editing your site
- manage events in one place
- adjust tracking as your needs grow
This becomes especially important if you plan to:
- track conversions
- run advertising campaigns
- analyse user behaviour in more detail
In practice, many websites start simple and later switch to GTM. But if you already know that tracking matters for your business, starting with GTM saves time in the long run.
Read more: How to Improve Time to First Byte (TTFB) for Your WordPress Site
How to Check If GA4 Is Working Correctly
After installation, it is important to verify that data is actually being collected. A setup without validation can lead to incorrect reports later.
The easiest way to check this is through GA4 itself.
Use Realtime Report
Go to your GA4 dashboard and open:
- Reports → Realtime
Then visit your website in another tab.
If everything is set up correctly, you should see:
- at least one active user
- your current session reflected in real time
This confirms that GA4 is receiving data.
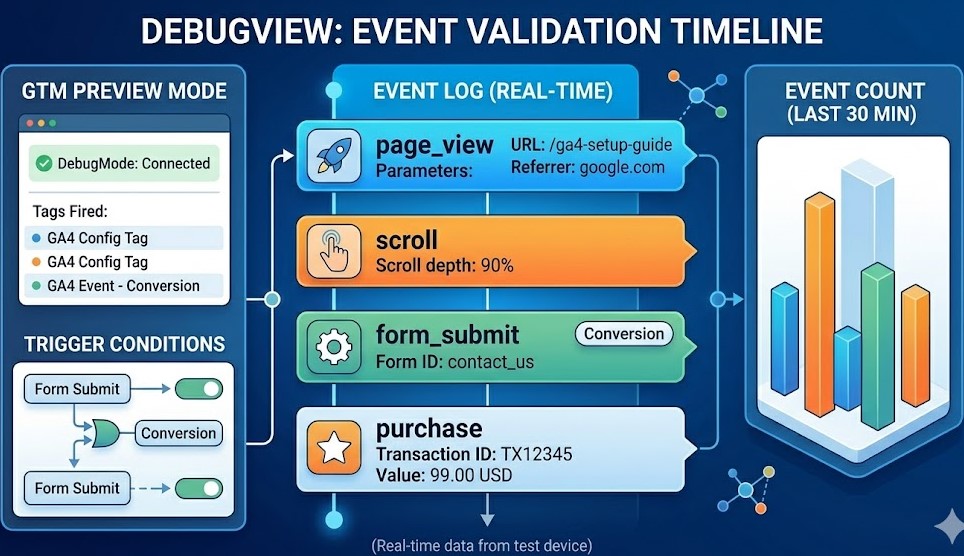
Use DebugView (More Accurate Check)
For a more detailed check, use the DebugView in Google Analytics, which shows individual events as they happen.
To access it:
- go to Admin → DebugView
- enable preview mode in GTM (if using GTM)
You will see events such as:
- page_view
- scroll
- click
This helps confirm that tracking is working at a deeper level.
What You Should Look For
At this stage, focus on simple validation:
- events are being triggered
- page views are recorded
- your visit appears in reports
You do not need to analyse data yet. The goal is just to confirm that everything is working.
Common Signs Something Is Wrong
If you do not see data, check:
- incorrect Measurement ID
- tracking code not installed properly
- GTM container not published
- browser extensions blocking analytics
Even a small issue here can prevent GA4 from collecting data.
Why This Step Matters
It may seem like a small check, but it is critical.
If tracking is not working correctly from the start:
- data will be incomplete
- reports will be unreliable
- decisions based on this data can be misleading
A quick verification now saves time later.
Common GA4 Setup Mistakes to Avoid
A basic GA4 setup is not difficult, but small mistakes can distort your data from day one. The problem is that these issues are not always obvious at first. You may still see traffic in your reports, but the numbers can be incomplete, duplicated, or simply misleading.
Here are the most common setup mistakes to watch for.
Using the Wrong Measurement ID
Each GA4 property has its own Measurement ID. If the wrong ID is added to your plugin or GTM tag, data will be sent to the wrong property.
This usually happens when:
- several websites are managed under one account
- an old property is reused by mistake
- the ID is copied from the wrong stream
It sounds minor, but it makes your reports useless for that site.
Installing GA4 Twice
This is one of the most common problems on WordPress.
For example, GA4 may be added:
- through a plugin
- and through Google Tag Manager at the same time
When that happens, page views and other events can fire twice. The result is inflated traffic, inaccurate engagement data, and reports you cannot fully trust.
If you use GTM, make sure another plugin is not already injecting GA4 in the background.
Assuming Default Tracking Is Enough
GA4 starts collecting data quickly, but default tracking only shows part of the picture.
You may see:
- page views
- scroll activity
- clicks
But you may still miss the actions that matter most, such as:
- contact form submissions
- quote requests
- lead generation
- completed purchases
This is where many websites stop too early. They install GA4, see activity, and assume tracking is complete. In practice, meaningful measurement usually requires additional event and conversion setup.
Forgetting to Publish the GTM Container
If you install GA4 through Google Tag Manager, creating the tag is not enough. The container must also be published.
This is a very common oversight. Everything may look correct inside GTM, but nothing appears in GA4 because the changes were never pushed live.
A quick check in Realtime or DebugView usually reveals this immediately.
Not Testing the Setup Properly
Some site owners install GA4 and move on without checking whether events are actually firing.
That creates a risk. If something is wrong, the issue may remain unnoticed for days or even weeks.
At minimum, always test:
- whether your visit appears in Realtime
- whether key events appear in DebugView
- whether the correct property receives the data
This simple step gives you confidence that the setup is technically correct.
Ignoring Existing Tracking Code
Older analytics scripts, theme-based inserts, or previous plugin settings can remain active even after a new setup is added.
This can lead to:
- duplicate tracking
- conflicting tags
- inconsistent reports
Before finalising GA4, it is worth checking whether another tracking method is already active on the website.
Why These Mistakes Matter
The main risk is not that GA4 stops working completely. The bigger issue is false confidence.
You may think your analytics is accurate while the setup is quietly collecting the wrong data. And once decisions are based on those reports, the cost of a small technical mistake becomes much higher.
That is why a careful setup matters. Not because GA4 is difficult, but because reliable data depends on getting the basics right.
Read more: WordPress Marketing Tools: How to Grow Traffic, Leads, and Sales
What to Do Next: Start Tracking Conversions (Don’t Skip This)
At this point, GA4 is already installed and collecting data. You can see traffic, user activity, and how visitors interact with your website on a basic level.
However, there is an important distinction to keep in mind.
Data does not equal results.
By default, GA4 shows behaviour. It tells you what users do on your site, but it does not automatically show whether your website is achieving its actual goal. This is where conversion tracking becomes essential.
What Are Conversions in GA4
A conversion is any action that has value for your business. The exact definition depends on your website, but in most cases it includes actions such as:
- contact form submissions
- quote requests
- booked calls
- purchases
- newsletter sign-ups
These actions indicate real intent. They show that a user is not just browsing, but taking a meaningful step.
Why This Step Matters
Without conversion tracking, you can still analyse general behaviour. For example, you will be able to see:
- which pages get traffic
- how long users stay
- where they click
But this only gives part of the picture.
You will not know:
- which pages generate leads
- which traffic sources bring actual customers
- where users drop off before converting
From a business perspective, this creates a serious gap. You may invest in SEO or paid campaigns, see traffic increase, and still not understand whether that traffic leads to real results.
How GA4 Changes Once Conversions Are Set
When conversions are properly configured, your analytics becomes significantly more useful.
Instead of just observing activity, you can start identifying value:
- which channels bring qualified users
- which pages contribute to conversions
- how users move through your site before completing an action
At this point, analytics becomes a tool for decision-making, not just reporting.
Where Google Tag Manager Becomes Important
As soon as you move beyond basic tracking, the setup becomes slightly more technical.
GA4 does not automatically track actions such as:
- form submissions
- button clicks
- specific user interactions
To capture these correctly, you usually need:
- custom events
- proper triggers
- a structured tracking setup
This is where Google Tag Manager becomes especially useful. It allows you to define what a conversion is and manage tracking without modifying your website code each time.
A Simple Way to Think About It
At a basic level, the progression looks like this:
Traffic → Behaviour → Conversions → Decisions
Many websites stop at the first or second stage. However, real value begins when you move further and start measuring outcomes, not just activity.
Key Takeaway
Installing GA4 gives you visibility into what is happening on your website. But to understand performance and improve results, you need to track what actually matters.
Once conversion tracking is in place, your analytics shifts from collecting data to supporting clear, informed decisions.
Understanding GA4 Events (Simple Explanation)
Earlier, we mentioned that GA4 is built around events. Now it is worth looking at this concept a bit more clearly, without adding unnecessary complexity.
In GA4, every user interaction is treated as an event.
This includes:
- page views
- clicks
- scroll depth
- form submissions
- video plays
There is no separation between “basic” and “advanced” actions. Everything follows the same structure.
What This Means in Practice
Instead of relying on fixed metrics, GA4 allows you to define what matters.
For example:
- a page view → event
- a button click → event
- a form submission → event
This gives you flexibility.
You are not limited to standard reports. You can track specific actions that reflect how users interact with your website.
Types of Events in GA4
To keep it simple, events can be divided into a few groups:
- automatically collected (page_view, session_start)
- enhanced measurement (scroll, outbound clicks)
- custom events (form submissions, specific actions)
You do not need to configure everything at once. But understanding this structure helps you expand tracking later.
Why Events Matter
This is where GA4 becomes more than just a traffic tool.
Once you start working with events, you can:
- track user behaviour more precisely
- identify important interactions
- define conversions based on real actions
Without events, GA4 only shows surface-level data.
With events, it becomes a system that reflects how your website actually performs.
Simple Logic Behind Events
At its core, everything follows a straightforward structure:
User Action → Event → Measurement → Insight
This is why earlier we said that installation is only the first step.
Events are what connect user behaviour to meaningful data.
FAQ
Is Google Analytics 4 free to use?
Yes, GA4 is free. You can create an account, install it on your WordPress website, and start collecting data without any cost.
There is also a paid version (GA4 360), but for most websites, the free version is more than enough.
Do I need Google Tag Manager to use GA4?
No, you can install GA4 without Google Tag Manager by using a plugin.
However, if you plan to track conversions, events, or more detailed user interactions, GTM gives you more control and flexibility.
How long does it take for GA4 to start tracking data?
GA4 can begin collecting data almost immediately after setup. In many cases, you can see activity in Realtime within minutes, although some standard reports may take longer to populate depending on the report type.
Can I install GA4 without a plugin?
Yes. You can install GA4 manually by adding the tracking code to your website or by using Google Tag Manager.
Plugins are simply a more convenient option, especially for beginners.
Why am I not seeing data in GA4?
There are several possible reasons:
- incorrect Measurement ID
- tracking code not installed correctly
- GTM container not published
- browser extensions blocking tracking
Checking the Realtime report and DebugView usually helps identify the issue quickly.
Do I need to set up conversions separately?
Yes. GA4 does not automatically track business actions like form submissions or purchases.
You need to define and configure conversions manually. This is what allows you to measure real results, not just traffic.
Final Thoughts
Setting up Google Analytics 4 on your WordPress website is a practical first step toward understanding how your site actually performs. It gives you visibility into user behaviour, traffic sources, and how visitors interact with your content.
At the same time, basic tracking only provides a general overview. To get real value from your data, it is important to move beyond simple metrics and start focusing on meaningful actions. This includes refining your event tracking, understanding how users move through your site, and aligning analytics with your actual goals.
As your website grows, analysing data manually becomes more difficult. In such cases, AI Integration can help process information more efficiently and highlight patterns that are not always obvious at first glance.
For websites that rely on paid traffic, connecting GA4 with Google Ads Setup allows you to evaluate campaign performance more accurately and understand which channels contribute to measurable results.
In the end, analytics should not just collect data, but support better decisions and help you improve your website in a consistent and structured way.