















Inicio rápido: lanza tu empresa de traslados en horas
Configura CodiCo desde cero y acepta tus primeras reservas el mismo día: email, reglas de pedidos, pagos, horario, divisiones, aeropuertos, servicios y zonas.
Qué verás en este vídeo
Haz clic en una marca de tiempo para reproducir el vídeo desde ese momento.
Transcripción del vídeo
0:02hello everyone in this video but I want to talk about a few key steps you need to take for a quick start and to begin using our system first after purchasing our system and logging into your admin account you need to go down to the settings section and then to the general subsection once here you will need to fill in the following information this includes the name of the email sender service which is your company name the contact person’s email and your phone number next you need to add two Google Map Keys one for the browser key another for the server you can find instructions on how to create your Google Map keys on our YouTube channel it’s crucial to add them here because without Google Maps Keys the system won’t work fully and won’t allow you to create orders as Google Maps is used for routes and pickup and drop off points making this a key
1:18step the next step is to set up the stripe transaction fee what is this as you know stripe charges a small fee for transactions our system can add this fee to the order cost including it in the total here youi here you can set the stripe fee to add to the order by default Stripes fee is 3% next let’s talk about SMTP settings SMTP sends emails from your system you can choose any SMTP provider free or paid use any provider you prefer what should be done here the first field is the driver field here you usually enter the info from your SMTP provider about the driver if they don’t provide it just write SMTP here next is the host you get this info from your sntp provider you also get the port your username usually an email and the password all this info is provided by
2:35your sntp provider when you register very important most sntp providers require you to verify your email and domain name to prove ownership and pass the check this is necessary because without this check not all mail services can receive your emails for example if you don’t confirm in your SNP service that you own your domain Yahoo and Gmail won’t receive emails from you there are many such situations so it’s crucial when you register with a mail service like brevo mail gun or another it’s vital to confirm that the domain name and the email address you want to use belong to you then you enter all your sntp data here specify the email from which you want the system to send emails and indicate the mail sender name basically the sender name from the system once everything is entered and
3:51filled out you can click the save button this is the first and most important step to launch our system The Next Step I recommend you go to the booking subsection in the same setting section and here the platform will offer personalized settings for your system this is filled out once edited very rarely so I recommend you pay maximum attention to it set the right settings and not return to the step here you specify what time restrictions you have for working with transfers airport transfer orders specifically how long you allow for editing the order how long you allow for clients to cancel the order and how long you allow for taxi companies to accept the order similar settings for City Taxi and similar settings for delivery next you specify which orders are Urgent how much time you give taxi companies to review when they receive a new order from you and how long they have to decide whether to accept it or not because time is ticking the order is approaching and we can’t just sit and wait for our partner the taxi company to decide whether to take the order or not
5:07or maybe they’re asleep and don’t see your order that’s why we have limits to restrict the decision making time if your partner doesn’t make a decision then after the time limit expires the system will send your order to all other partners and then whoever grabs the order first will be the one to fulfill it the next settings are for automatic refunds meaning if a client paid but for some reason canel the order and needs a refund you can do it manually in the invoices section you’ll see the order and a refund request which you approve manually and then the money is returned to the client the client or you can enable the automatic refund feature and basically forget about these refund requests the system will automatically refund clients if they cancel the next setting is for when you want users to provide a precise address including Street and house number when placing an order in your system you need to enable this option if it’s enough for you you don’t want
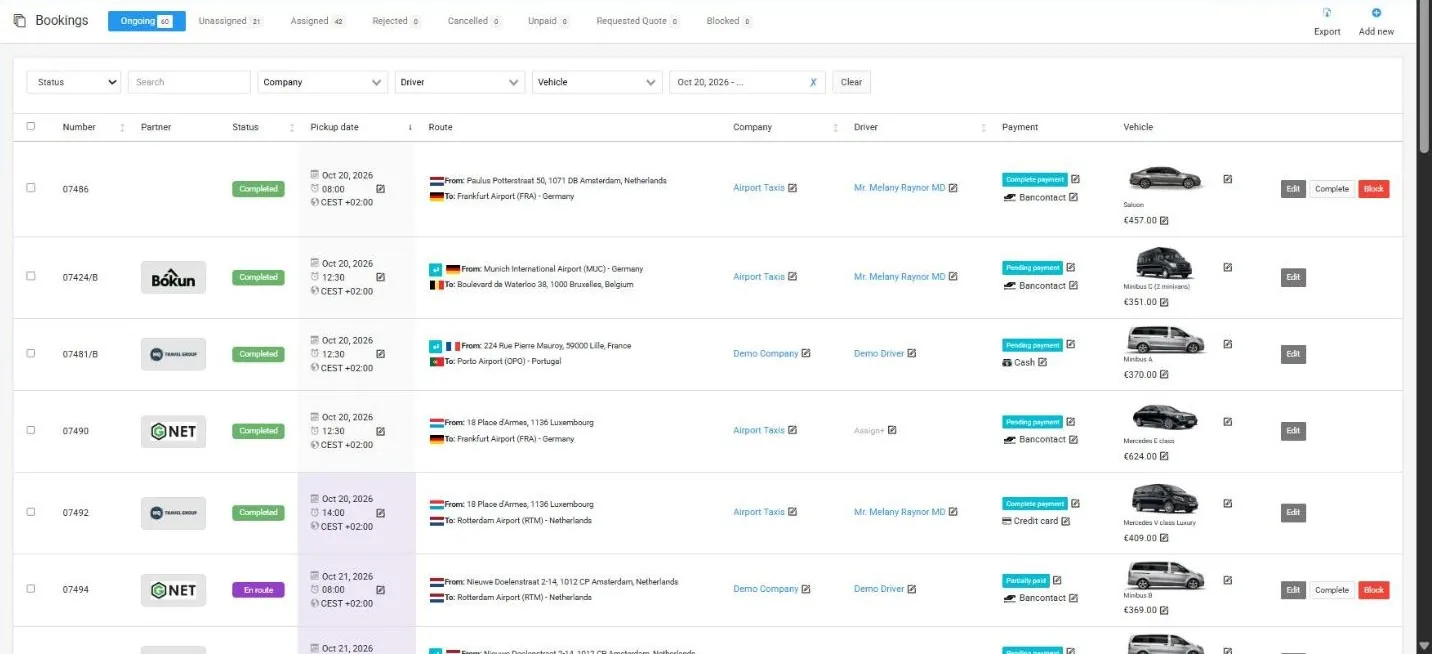
6:24to burden your client right away with exact addresses exact data and it’s enough for you if he provides approximate addresses at the first stage then you can disable this feature next are the settings additional order settings then settings on whether you want to work with cash payments or not the next setting Auto assigned to companies means that if you enable it the system will automatically assign orders to your partners the system will find company that fit the order can do it have the right vehicle class work in the right count zones airports and then assigns the order to them offering them to accept it all this will happen automatically if you uncheck this box you’ll have to assign orders manually new orders first go to the pending section if we go to bookings here you’ll see the the pending section orders first go here to the pending section from here you manually choose which company to assign it to and accordingly assign this order to that
7:41company and it moves to the assigned section indicating that this order is assigned to a company and you wait to see if the company accepts or not if it declines the order goes to the reject section and you understand that a company has refused the order so you need to quickly find another company to fulfill it if it accepts the order moves to the job section where it will show which company will handle it and which driver will make the trip this is precisely configured with this option that is the automatic system will do it all or manually if you want to handle it yourself next is the disable booking option which allows you to turn off the ability to create new orders from your site meaning clients won’t be able to create new orders you can also set time intervals meaning a specific time period during which your clients won’t be able to place orders for example you don’t want to receive orders at night because it’s nighttime you’re asleep you’re not working in this case you can set time intervals like from 11:00 p.m. to 8:00 a.m. you don’t want to accept orders and the system won’t allow users to create new
8:56orders the next very important opt option is the new Zone to Zone feature what is it we developed an Innovative trip pricing setting that is highly flexible and allows you to set trip prices as you wish and this option is exactly that as I mentioned earlier our system allows creating countries which we call divisions creating countries and then breaking them into smaller pieces into zones zones can be arbitrary you can draw them as you like they can be airports they can be stations cities districts landmarks anything and you can create as many zones as you want and then in the car settings the system will allow you to specify special prices meaning you have base prices per mileage or fixed base prices for a trip in this car and you can also specify your personal individual prices depending on the zones that is in one specific Zone you have one price in another specific Zone you have another price and a trip between one zone to another has completely different third
10:13prices that is you can set fixed prices you can set prices per mileage you can set discounts depending on the route duration all this allows you to personalize the section the next option allows you to limit your taxi company’s operations within one division meaning one country or several that is if you have companies operating in several countries and they can take orders from one country to another or be in Belgium for example and take orders from Germany you will need to remove this restriction so that zones can work so companies can operate in multiple countries your partners Taxi companies you yourself operate only in one division or for some reason don’t want companies to serve multiple countries simultaneously then you should uncheck this box next these are settings for maximum radi as we remember when creating a company if this company provides taxi services in the city or delivery services you can specify the areas zones cities where they operate that is why offer a company an order from one end of
11:28the city it doesn’t serve or in a city it doesn’t serve that is for example a company Works exclusively provides its delivery services or taxi services exclusively only in this city and not in any others accordingly you can set a filter specify the city and set the radius within which area this company provides its taxi services the radius limits are set here by default it’s 10% but you can decrease or increase this radius the next setting is the default partner commission as I mentioned all users registered in our system are partners by default they are Partners to have their referral link their referral QR code and their referral widget and by default all these users will have the referral commission you set here in this case it’s t that is any user who registered in our system will be a partner participate in the referral program and their commission will be tent you can change this commission to any other number and accordingly all new users will be registered with the new
12:45commission and the last setting is to redirect the user after placing an order redirect the user to their personal account on the page of the newly created order or leave them on your site that is the user visits your site finds the booking widget fills it out selects a car chooses a payment method if it’s electronic payment makes the payment and then it’s up to you you can leave them on your site and display a thank you message or you can automatically redirect the user from the site to their personal account in your system and open the order they just created this option allows you to do that if the box is checked the system will send them to their personal account account on the order page after placing the order if you uncheck the Box a thank you message will be displayed and the user will remain on your site that’s it this is the second step you need to set up before starting to use our system The Next Step I would recommend is to go to the companies section and create the companies you will work with in this case we have one test company you will need to enter the company data specify what services they Prov divide specify
14:00the country division where it operates set up the cars they have specify its billing details and most importantly specify the airport if this company provides airport transfer services you need to specify which airports it serves why is this necessary this is necessary because one country can have five six or 10 airports and the company may not serve all of them and it doesn’t need to receive orders from airports it doesn’t serve so here you can set it up that from these airports this company should receive orders but from others not on this list the company will not receive orders note that when adding here in this field you see airports from your selected division the current one so if you are currently working in the country of Belgium you will only see Belgian airports here so if I type now you see I only see Brussels and charoy airports if I change the division say to Luxemburg I will see different airports here I will see I I need to refresh the page after that I I will see different airports
15:15here for some reason Austin is now well these are test data for some reason Austin is located in Luxembourg the point is whichever country you have selected here you will see the airports of that country here if your partner your taxi company operates in several divisions say Belgium and France you will need to add the airports that serves in Belgium and the airports it serves in France if it’s several divisions several countries you will need to specify which cars it has in Belgium and scrolling down you will need to specify which cars it has in France if the company is a private one meaning it’s a single driver you will need to check this box before creating and the system will automatically create a single driver for this company using the company’s data if the company has multiple drivers more than one after creating this company you will either need to go to the drivers section and create drivers for this company or ask your partner to log into their personal account and add drivers themselves because without drivers the company cannot accept orders as there is no one to drive the client the company exists but there are no
16:31drivers the company exists cars are available airports are served but there are no drivers therefore the company must have drivers and you can do this as an administrator in the driver section by clicking on add new you will go to a page where you select the company you want to assign for example my taxi and then fill in the drivers’s details or the taxi company itself can do this by logging into their personal account the next step after you have added the company and set everything up I recommend you go to the vehicle section which is also a very important section where your cars are displayed by country for example this car is in Belgium these are the cars available in Luxembourg these are the cars available in the Netherlands these are the cars available in France you will need to go in and set up your cars in the countries where you operate how to do this you will need to go in select the class of car you are interested in for example a sedan and click on more info here you will see a page with information about the car and its basic settings why basic I will explain a bit later there is also a switch here as you
17:48know our system offers three types of services these are airport transfers City taxis and delivery accordingly each car has has three tabs that you can configure this tab is for airport transfers if I click on City Taxi I will go to the settings for this type of car for City taxis and if if I click on delivery I will go to the settings for this car for delivery trips as we can see this car is not available for delivery as the checkbox is not checked meaning is available is not enabled so the car is unavailable here you will need to set the car’s parameters size and also set special prices between zones I recorded a separate video about this you can find it on our YouTube channel and see how to set up cars after you have set up all the cars the last thing you need to do is check your systems which are the Zone settings perhaps even before you start working on the cars you might want to refer to the Zone settings and check your Zone settings how to do this by clicking on the Zone section you see a map here at the top
19:05you see a list icon if you click on it a list of countries that we have already added to your system by default for your convenience appears for example if I click on the I icon for the Belgium section you will see the entire country of Belgium if I click on France you will see the pre-prepared zone of France on the map if I click on Spain you will see Spain if I click on the Netherlands you will see the Netherlands if I click on Austria you will see Austria and so on let’s return to Belgium in the case of Belgium we have a division we have the country of Belgium by selecting it we can switch to the second tab called zones by clicking on the Zone we switch and see a list of zones we have already divided Belgium into special zones for you and here you can see the list of these zones here is the Brussels Zone here is the Brussels Airport Zone here is the Austin Airport Zone here is the Gent Zone here is the Brugge Zone here is the antp airport zone so they are already ready there are many such zones on the second page please there’s
20:20the LI Zone check the list of zones already created for your country if they exist you might need to fix some or add new ones you can do this right here in the zones section then you can set up machines and set special prices for trips between or within certain zones to set these prices create these zones or ensure they exist and are correctly drawn these are the main steps for a quick launch to start using the system ASAP the final step once everything is ready is integration with your website scroll to the bottom to the widget integration section to see your widget settings this is the code to place on your site to start receiving orders so users can see the booking widget and use it to place a new order and you receive it in your system to place it add just two lines to your site where you want to display our booking form first is the script and
21:37second is the link to your widget there are additional settings explained in more detail in another video about placing and setting up our booking widget on your site you can watch it to understand more in detail here I talked about the main steps to launch your system and start using it ASAP thank you for your attention